

Unleash Your Creativity with Our CapCut Expertise
Video editing has become an essential skill in today’s digital landscape, and CapCut has emerged as a powerful tool for creators. With its intuitive interface and robust features, CapCut enables users to bring their visions to life. In this article, we will share our expertise on how to leverage CapCut for creative video editing.

We will delve into the world of CapCut, exploring its capabilities and providing guidance on how to use it effectively. By the end of this CapCut professional guide, you will be equipped with the knowledge to enhance your video editing skills and unlock new creative possibilities.
Key Takeaways
- Understanding the basics of CapCut and its video editing capabilities
- Learning how to navigate the CapCut interface
- Discovering advanced features for creative video editing
- Tips for optimizing your video editing workflow with CapCut
- Best practices for achieving professional-looking results
Why Choose CapCut for Video Editing?
CapCut has established itself as a leading video editing software, and for good reason. Its standout features make it an attractive choice for both novice and experienced editors. In this section, we’ll explore the key advantages that set CapCut apart.
One of the primary reasons editors gravitate towards CapCut is its user-friendly interface. The software is designed to be intuitive, making it easy for users to navigate and find the tools they need. This accessibility is crucial for creators who want to focus on their content rather than getting bogged down in complicated editing processes.
User-Friendly Interface
A user-friendly interface is not just a convenience; it’s a game-changer. With CapCut, the streamlined design allows for a seamless editing experience. The layout is clean, and the tools are logically organized, making it simple to trim clips, add transitions, and apply effects.
- Easy navigation through a clean and intuitive design
- Streamlined toolsets for trimming, transitioning, and effects
- Customizable workspace to suit individual preferences
Versatile Editing Tools
Beyond its user-friendly interface, CapCut boasts an impressive array of versatile editing tools. From basic trimming and cutting to advanced color grading and audio adjustments, CapCut provides a comprehensive toolkit for video editors.
“The versatility of CapCut’s editing tools allows creators to bring their vision to life without limitations.”
The software supports a wide range of file formats, ensuring compatibility with various media sources. Whether you’re working on a short social media clip or a longer-form video, CapCut’s tools are adaptable to your needs.
- Advanced trimming and splitting capabilities
- Color grading and adjustment tools for enhanced visuals
- Audio ducking and keyframe animations for dynamic soundtracks
By combining a user-friendly interface with versatile editing tools, CapCut empowers creators to produce high-quality video content efficiently. Whether you’re a beginner looking to get started or a seasoned professional seeking advanced features, CapCut is well-equipped to meet your video editing needs.
Getting Started with CapCut
Getting started with CapCut is straightforward, and we’re here to walk you through every step of the way. To begin your video editing journey, you’ll first need to download and install the CapCut app on your device.
Downloading and Installing CapCut
Downloading and installing CapCut is a simple process. First, navigate to your device’s app store – be it the Apple App Store for iOS devices or Google Play Store for Android devices. Type “CapCut” in the search bar, and you’ll be presented with the official CapCut app. Click on the “Install” or “Get” button to begin the download process. Depending on your internet connection, this should only take a few moments. Once the download is complete, the app will automatically install on your device.
After installation, locate the CapCut app on your device and tap on it to open. You’ll be greeted with a user-friendly interface that makes it easy to start your video editing journey.

Setting Up Your Account
To fully utilize CapCut’s features, setting up an account is a crucial step. Upon opening the app for the first time, you’ll be prompted to either log in or create a new account. CapCut offers various login options, including email, Facebook, and Google accounts, making it convenient to sign up or log in.
Once you’ve logged in, you’ll have access to a range of features, including cloud storage for your projects, allowing you to access your work from any device. Setting up your account also enables you to share your projects with others and collaborate in real-time.
By following these simple steps, you’ll be well on your way to unlocking the full potential of CapCut and creating stunning videos with ease.
Importing Media into CapCut
CapCut makes it easy to import various media types, getting you started on your video editing journey. Whether you’re working with videos, photos, or audio files, understanding how to import media is crucial for a seamless editing experience.
Supported File Formats
CapCut supports a wide range of file formats, making it versatile for different types of media. You can import video files such as MP4, AVI, and MOV, as well as image files like JPEG, PNG, and GIF. For audio, CapCut accepts MP3, WAV, and other popular formats.
It’s worth noting that having a broad range of supported formats means you can work with media from various sources, including smartphones, cameras, and stock media libraries.
Steps to Import Media
Importing media into CapCut is a straightforward process:
- Open CapCut and start a new project or open an existing one.
- Tap or click on the “Import” button, usually represented by a “+” icon.
- Select the media type you want to import: videos, photos, or audio.
- Choose the files you wish to import from your device.
- CapCut will then load your selected media into the project library.

Once your media is imported, you can start arranging, editing, and enhancing your content using CapCut’s various tools and features.
Navigating the CapCut Workspace
Navigating the CapCut workspace is essential for unlocking the full potential of this powerful video editing tool. As we explore the CapCut editor, understanding the layout and functionality of its interface is crucial for a seamless editing experience.

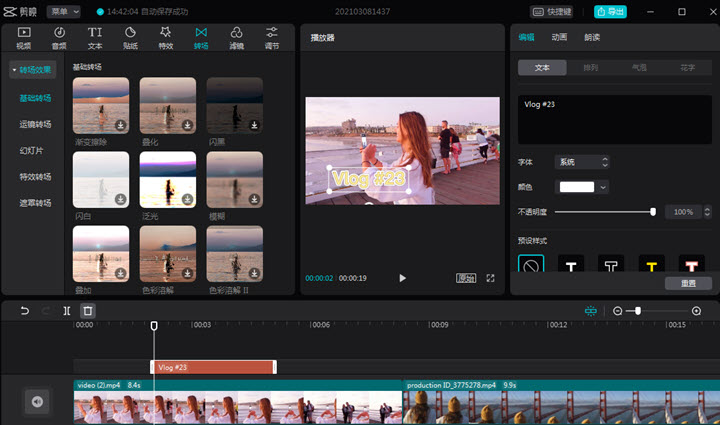
Overview of the Editing Interface
The CapCut editing interface is designed to be user-friendly and intuitive, making it easier for both beginners and professionals to navigate. At a glance, the interface is divided into several key areas, each serving a specific purpose in the video editing process.
The toolbar at the top provides access to essential functions such as project management and settings. Below this, the timeline is where you’ll spend most of your time, arranging and editing your clips. The preview window above the timeline allows you to see how your edits look in real-time.
Important Panels and Tools
Several panels and tools are available within the CapCut workspace to enhance your editing experience. The library panel is where you can access your imported media, including videos, photos, and audio files. This panel is crucial for managing your project’s assets efficiently.
To the right of the timeline, you’ll find the inspector panel, which provides detailed controls for the selected clip or element. This is where you can adjust properties such as scale, rotation, and opacity, giving you precise control over your project’s visuals.
Additionally, the CapCut editor includes a range of tools for tasks such as trimming, splitting, and merging clips. These tools are designed to be intuitive, making it easy to achieve the desired effect without needing extensive training.
By familiarizing yourself with these components of the CapCut workspace, you’ll be well on your way to becoming proficient in using this powerful video editing software. As part of our CapCut professional guide, mastering the workspace is the first step towards creating stunning videos with ease.
Editing Basics in CapCut
To unlock the full potential of your video content, understanding the editing basics in CapCut is essential. CapCut is designed to simplify the video editing process, making it accessible to creators of all skill levels.
At its core, editing in CapCut involves a few fundamental steps that can elevate your videos from simple clips to engaging stories. Let’s dive into the basics, starting with how to manipulate your video clips.
Trimming and Splitting Clips
Trimming and splitting clips are foundational skills in video editing. Trimming allows you to remove unwanted parts from the beginning or end of a clip, while splitting enables you to divide a clip into multiple segments for more complex editing.
- To trim a clip, simply select it in the timeline and drag the edges to the desired length.
- Splitting a clip is just as straightforward; just place the playhead where you want to split and use the split tool.

These basic editing techniques are crucial for refining your video content and ensuring it flows smoothly.
Adding Background Music and Sound Effects
Adding background music and sound effects can significantly enhance the viewing experience of your videos. CapCut offers a vast library of music and sound effects that you can easily incorporate into your projects.
| Feature | Description | Benefit |
|---|---|---|
| Background Music | Adds atmosphere and emotional depth to your videos | Enhances viewer engagement |
| Sound Effects | Provides auditory cues and emphasizes actions | Improves video storytelling |
By mastering these editing basics in CapCut, you’ll be well on your way to creating captivating videos that resonate with your audience.
Advanced Editing Techniques
CapCut’s advanced editing techniques empower creators to produce high-quality, professional-looking videos with ease. By mastering these techniques, you can significantly enhance the visual appeal and narrative flow of your videos.
Utilizing Transitions Effectively
Transitions are a crucial element in video editing, allowing you to seamlessly move from one scene to another. CapCut offers a variety of transition effects that can be used to create smooth, engaging narratives.
- Fade In/Fade Out: Gradually introduce or conclude a scene.
- Slide: Move one scene into another from various directions.
- Zoom: Create a dynamic effect by zooming in or out of a scene.
To apply a transition, simply select the desired effect from the transitions menu and adjust its duration to fit your scene change.

Incorporating Text and Titles
Text and titles are essential for providing context, highlighting important information, and enhancing the visual appeal of your videos. CapCut offers a range of text editing tools that allow you to customize the appearance, animation, and timing of your text.
| Text Feature | Description |
|---|---|
| Font Styles | Choose from a variety of fonts to match your video’s style. |
| Text Animation | Animate your text with effects such as fade, slide, or zoom. |
| Text Color | Customize the color of your text to ensure it complements your video’s color scheme. |
By incorporating these advanced editing techniques into your video editing workflow, you can create more sophisticated, engaging videos that capture your audience’s attention.
Enhancing Your Videos with Effects
With CapCut, you can transform your ordinary videos into stunning visual experiences by applying various effects. The platform offers a wide array of tools and features designed to enhance the visual and auditory appeal of your videos.
Exploring Filters and Effects
CapCut provides a diverse range of filters and effects that can be applied to your videos to give them a unique look and feel. From basic adjustments like brightness and contrast to more complex effects like glitch and retro styles, there’s something for every creative need.
To apply a filter or effect, simply select the clip you wish to modify, navigate to the effects panel, and choose your desired effect. You can adjust the intensity of the effect using the provided sliders, allowing for precise control over the final look.
Color Grading in CapCut
Color grading is a powerful tool in video editing that allows you to evoke specific moods or atmospheres in your videos. CapCut’s color grading feature provides a range of LUTs (Look-Up Tables) and color adjustment tools that enable you to achieve a professional-grade look.
To access color grading in CapCut, navigate to the color adjustment panel and select from the available LUTs or manually adjust the color curves, saturation, and brightness to achieve your desired aesthetic.
Here’s a comparison of some of the effects available in CapCut:
| Effect | Description | Use Case |
|---|---|---|
| Glitch | A digital distortion effect | Music videos, futuristic themes |
| Retro | A vintage film style effect | Period dramas, nostalgic content |
| Black and White | Converts video to monochrome | Dramatic scenes, artistic projects |
By leveraging these effects and color grading capabilities, you can significantly enhance the quality and appeal of your videos, making them stand out in a CapCut review worthy of recognition.
Effective video editing with CapCut involves experimenting with these features to find the perfect look for your project.
Sharing Your CapCut Creations
Once you’ve edited your video in CapCut, it’s time to share it with the world. Sharing your creations is a crucial step in your video editing journey, as it allows you to showcase your work and connect with your audience.
We will guide you through the process of exporting your finished video and optimizing settings for various social media platforms. This will ensure that your videos are tailored to their respective audiences, maximizing their impact.
Exporting Your Finished Video
Exporting your video in CapCut is a straightforward process. To do this, navigate to the export section, where you can choose from various formats and settings. We recommend selecting the format that best suits your needs, whether it’s for YouTube, Instagram, or other platforms.
When exporting, consider the resolution, frame rate, and quality settings. For most social media platforms, a high-quality export with a suitable resolution and frame rate is ideal. You can also use the CapCut app tutorial to learn more about the export settings and how to optimize them for your needs.
Optimal Settings for Social Media
Different social media platforms have different requirements for video content. To maximize your video’s reach and engagement, it’s essential to optimize your export settings accordingly. Here are some CapCut tips and tricks for optimizing your videos for various platforms:
| Platform | Resolution | Aspect Ratio | Frame Rate |
|---|---|---|---|
| YouTube | 1080p or 4K | 16:9 | 30fps or 60fps |
| 1080p | 1:1 or 4:5 | 30fps | |
| TikTok | 1080p | 9:16 | 30fps or 60fps |
By following these guidelines and using the optimal settings for each platform, you can ensure that your CapCut creations are displayed in the best possible light, reaching and engaging your target audience effectively.
Collaborating on Projects with CapCut
CapCut offers robust features that facilitate collaboration among team members, making it an ideal choice for video editing projects that involve multiple stakeholders. Collaboration is at the heart of many creative projects, and CapCut’s features are designed to streamline this process.
Sharing Projects with Team Members
One of the key collaboration features in CapCut is the ability to share projects with team members. This feature allows multiple users to work on the same project, enhancing teamwork and reducing the time required to complete the project. To share a project, users can simply navigate to the project settings and invite team members by entering their email addresses or usernames.
Benefits of sharing projects include:
- Real-time feedback and revisions
- Improved communication among team members
- Enhanced collaboration on complex projects
Using Cloud Features for Collaboration
CapCut’s cloud features further enhance collaboration by allowing team members to access and work on projects from anywhere. This cloud-based functionality ensures that all team members are working with the most up-to-date version of the project, reducing errors and miscommunication.
The following table highlights some of the key cloud features in CapCut and their benefits for collaborative projects:
| Cloud Feature | Description | Benefit |
|---|---|---|
| Real-time Syncing | Projects are synced in real-time across all devices | Ensures all team members have the latest version |
| Cloud Storage | Projects are stored securely in the cloud | Reduces the risk of data loss |
| Access Control | Users can control who has access to their projects | Enhances security and privacy |
By leveraging these collaboration features, teams can work more efficiently and effectively on video editing projects with CapCut. Whether you’re working on a small team or a large enterprise project, CapCut’s collaboration tools can help you achieve your goals.
Tips and Tricks for CapCut Users
Unlock the full potential of CapCut with our top tips and tricks for users. As a powerful video editing tool, CapCut offers a wide range of features that can enhance your editing experience. By applying these tips, you can work more efficiently and effectively, producing high-quality videos that captivate your audience.
Keyboard Shortcuts for Efficiency
One of the simplest ways to boost your productivity in CapCut is by using keyboard shortcuts. These shortcuts allow you to perform common tasks quickly, saving you time and effort. Here are some essential keyboard shortcuts to get you started:
| Action | Shortcut |
|---|---|
| Undo | Ctrl + Z |
| Redo | Ctrl + Y |
| Copy | Ctrl + C |
| Paste | Ctrl + V |
| Split Clip | Ctrl + B |
By mastering these keyboard shortcuts, you can significantly speed up your editing process and focus on the creative aspects of your project.
Best Practices for Smooth Editing
In addition to using keyboard shortcuts, following best practices can help ensure a smooth editing experience in CapCut. Here are some tips to keep in mind:
- Organize Your Media: Before starting your project, organize your media files into folders. This will make it easier to import and manage your assets within CapCut.
- Use a Consistent Workflow: Establish a consistent workflow to streamline your editing process. This could include starting with a template, using a specific order for applying effects, or always exporting in the same format.
- Experiment with Effects: Don’t be afraid to try out different effects and filters to enhance your video. CapCut offers a wide range of options to help you achieve the desired look and feel.
As CapCut editor experts, we recommend regularly updating your software to take advantage of the latest features and improvements.
“The key to successful video editing is not just about using the right tools, but also about understanding how to use them effectively.”
By incorporating these CapCut tips and tricks into your workflow, you’ll be able to edit more efficiently and produce high-quality videos that engage your audience.
Conclusion: Elevate Your Video Editing with CapCut
As we have explored throughout this CapCut article, CapCut is a powerful video editing tool that offers a wide range of features to enhance your creativity. From its user-friendly interface to its advanced editing techniques, CapCut has proven to be a versatile tool for creators.
Unlocking Creative Potential
By utilizing CapCut’s features, such as color grading, filters, and effects, you can significantly elevate the quality of your videos. Our review of CapCut has shown that it is an excellent choice for both beginners and professionals looking to streamline their editing process.
Get Started with CapCut
We encourage you to start experimenting with CapCut and explore its capabilities. With practice, you can unlock your full creative potential and produce high-quality videos that captivate your audience.
FAQ
What is CapCut, and how does it differ from other video editing apps?
We use CapCut as a powerful video editing application that offers a wide range of tools and features for creating high-quality videos. Unlike other video editing apps, CapCut stands out with its user-friendly interface, versatile editing tools, and advanced features such as color grading and audio editing.
Is CapCut suitable for beginners, or is it geared towards experienced editors?
We find that CapCut is an excellent choice for both beginners and experienced editors. Its intuitive interface makes it easy for newcomers to get started, while its advanced features provide the depth and complexity that seasoned editors require.
What file formats are supported by CapCut, and how do I import media into the app?
We support a variety of file formats in CapCut, including MP4, MOV, and AVI. To import media, we simply need to follow the steps outlined in our guide, which involves selecting the desired files and uploading them to the app.
Can I collaborate with others on a CapCut project, and if so, how?
We can collaborate with team members on a CapCut project by sharing the project and utilizing the app’s cloud features. This allows multiple users to work together seamlessly, making it an ideal tool for teams and collaborators.
How do I export my finished video from CapCut, and what are the optimal settings for social media?
We export our finished video from CapCut by following the in-app export process, which allows us to choose from various settings and formats. For social media, we recommend optimizing the video settings according to the specific platform’s requirements, such as resolution, frame rate, and file size.
Are there any keyboard shortcuts or tips for working more efficiently in CapCut?
We have found that using keyboard shortcuts and following best practices can significantly enhance our productivity in CapCut. By utilizing these tips and tricks, we can work more efficiently and effectively, streamlining our video editing workflow.